The process from confirming the order to delivering it to your customer can be filled with lots of challenges. Since eCommerce businesses are valued by customer experience, a seamless, supportive, and adequately paved process of buying any product until it reaches their doorstep is the key to success in any eCommerce space.
Now, you can tackle many tools and tricks to improve your customer experience, but you cannot tolerate any mistakes when it comes to product shipping. However, you have all the privileges to access your store, so you can learn properly how to set up shipping on Shopify.
Understanding how to set up shipping on Shopify can be crucial since you must rely on customer satisfaction and fulfil their expectations.
In this article, let us guide you on how to set up shipping on Shopify and all the related queries around it.
How to Set up Shipping on Shopify
Now that we know the essential product shipping terms on Shopify, let’s understand how to set up shipping on Shopify one step at a time so you can upskill your shipping game and mark your place in the business.
Hire a Shopify Expert to set up industry-standard shipping on your store!
Request a quote today, and let us build a cutting-edge setup for your Shopify store!
Step 1 – Set Your Shipping Locations
Your shipping location is the one where customers’ orders are sent. They could be set up by customers while creating a new Shopify store account to buy products. The location they enter is considered their shipping address.
A fulfilment feature is available whenever the customer switches their location, so it can be added to the new location as soon as they order from the same.
If you own an eCommerce store and need to understand how to set up shipping on Shopify, you can either use a third-party app and forget about the hassle, or you can set them manually and understand how it actually works.
You can also set more than one location according to your Shopify plan. Details below:
| Plan |
Number of Set Location Limit |
| Shopify Lite |
Max 3 |
| Shopify Basic |
Max 4 |
| Shopify Standard |
Max 5 |
| Shopify Advance |
Max 8 |
| Shopify Plus |
Max 20 (Contact Shopify Support if you need 20+ locations) |
Here’s how you can add locations:
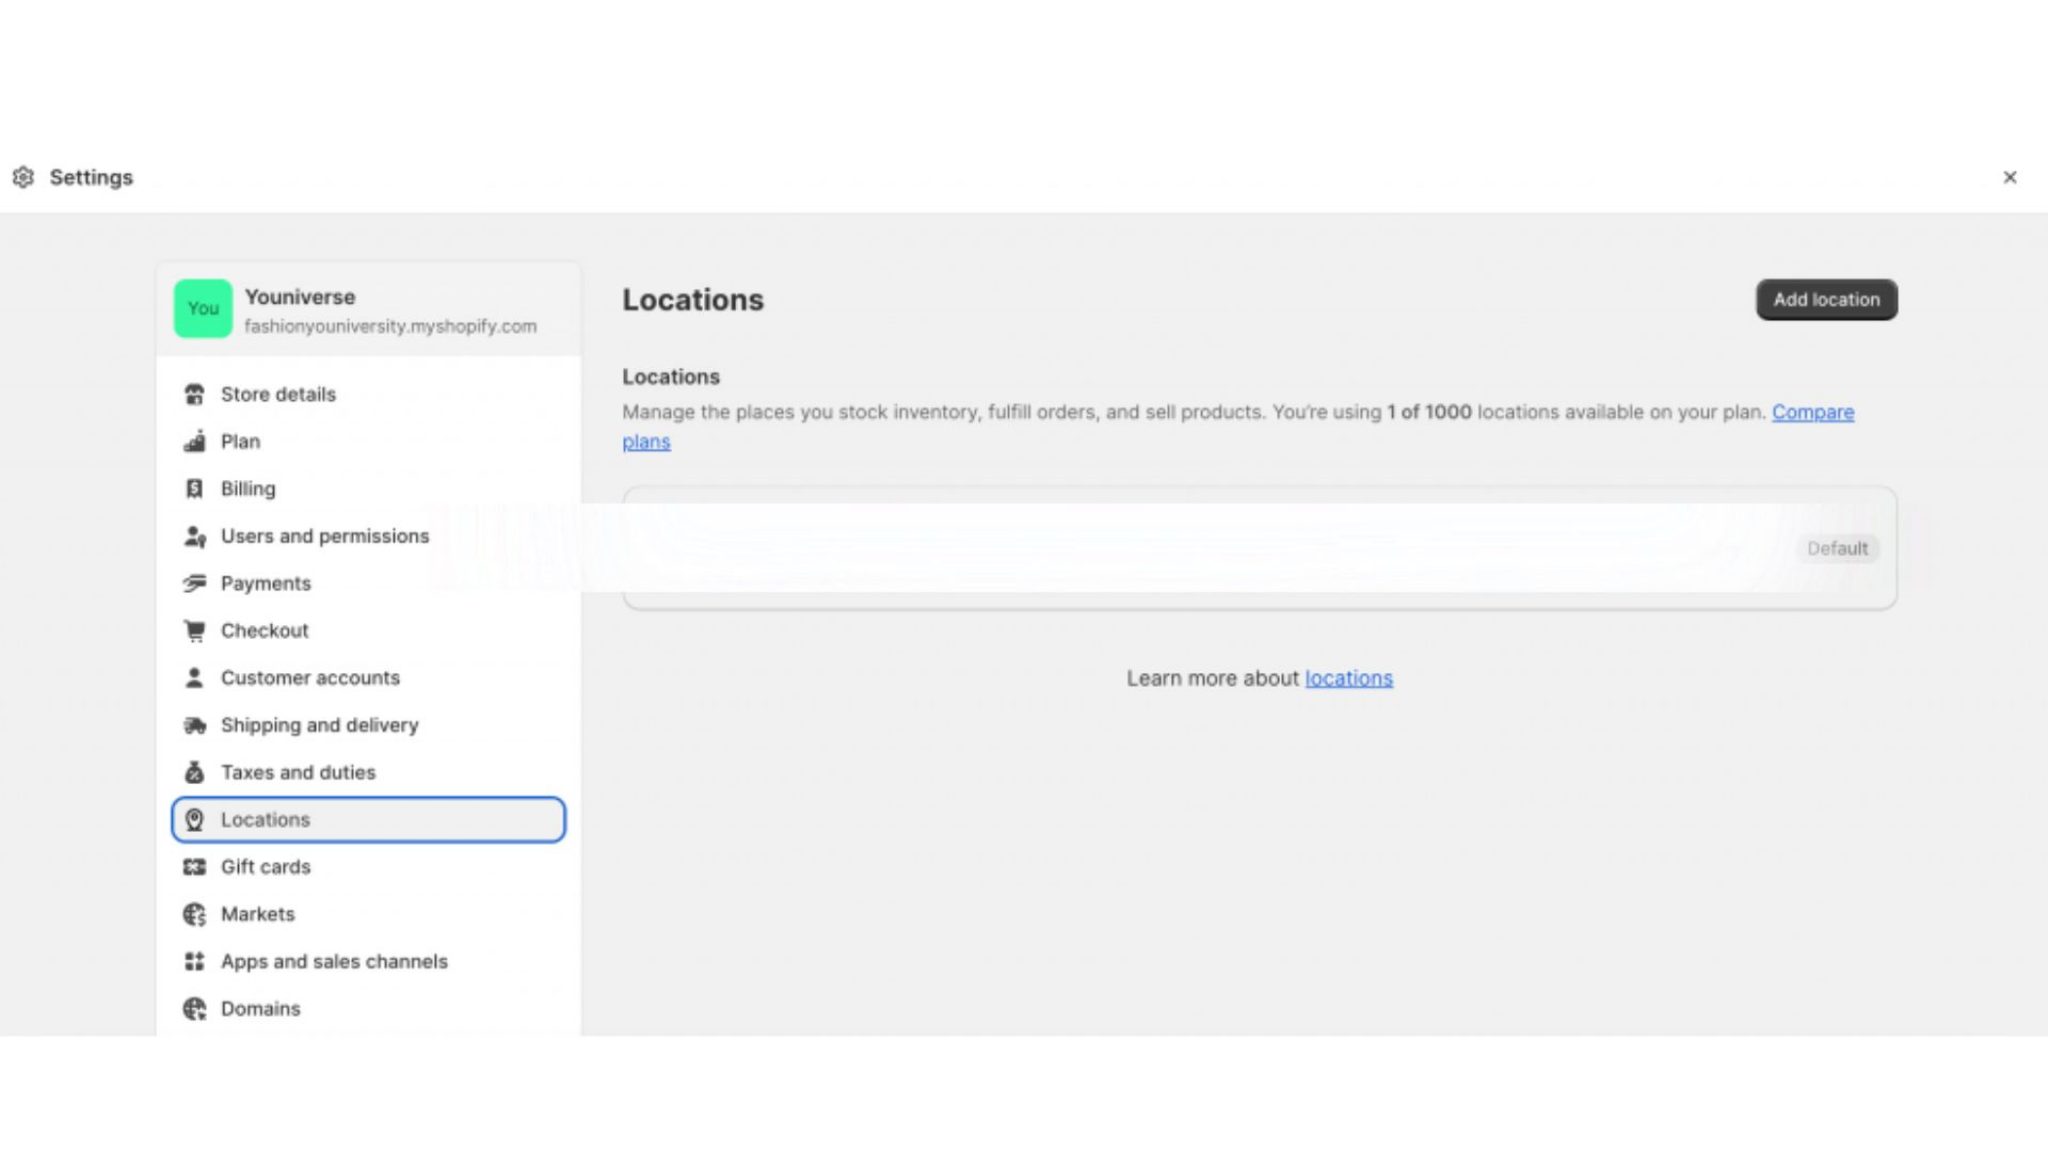
Open your Shopify admin panel from your preferred browser and navigate to Settings from the down-left corner of the screen.
In the settings menu, find and select Locations.
Now select Add Location to add the location where you’re going to stock your inventory.
Enter the location details such as location name, full address and phone number. After fulfilling the preferred information, scroll down and click on the Fulfill online orders from this location checkbox.
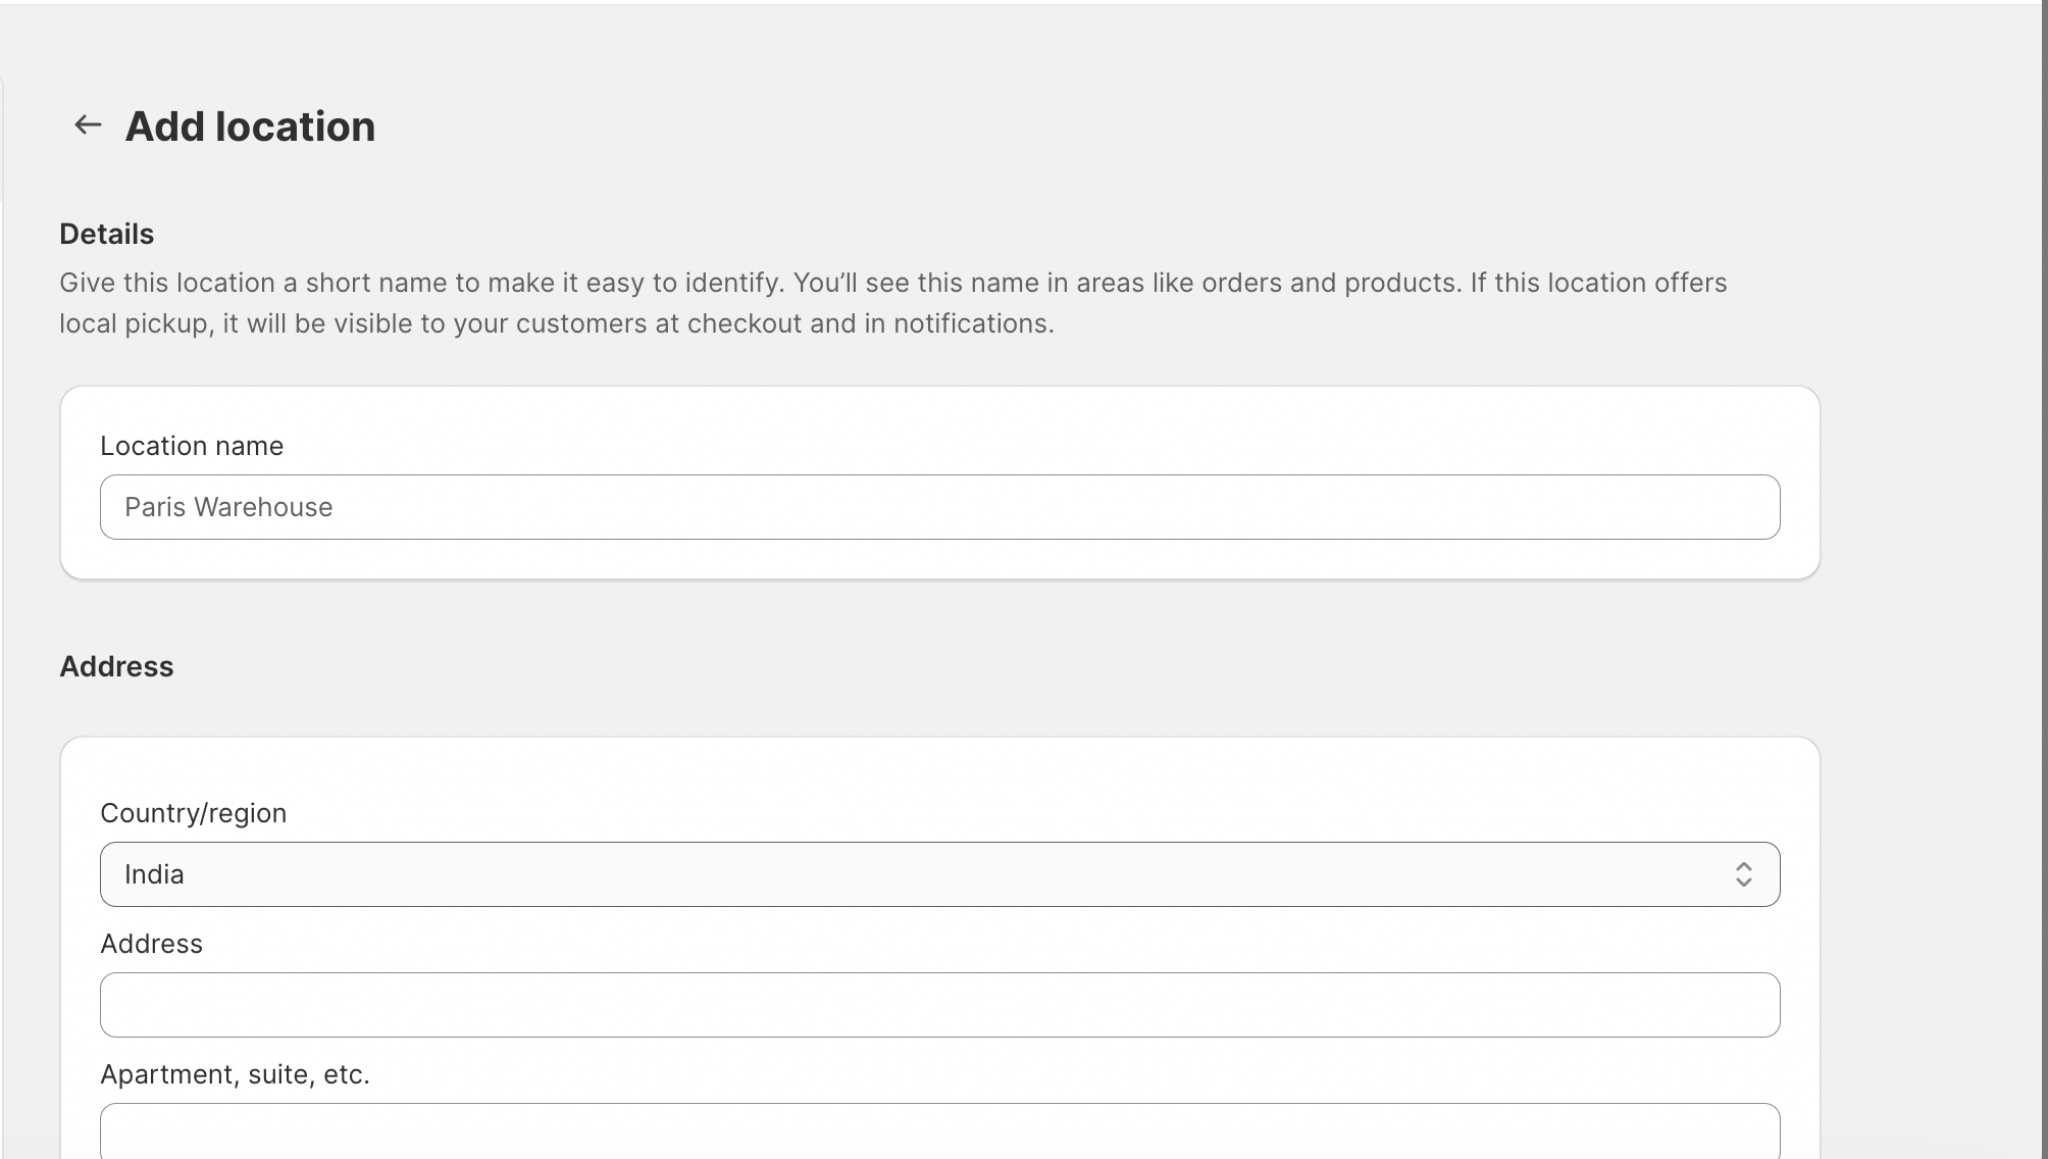
Re-ensure the provided information and hit Save.

Step 2 – Set up Shipping Profiles
Shipping profiles are a set of rules set by businesses that can vary product-by-product to provide adequate shipping prices. Simply speaking, shipping rates can be determined by individual products and charge the associated amount by calculating the distance and their carrier.
Why shipping profiles, you may ask? Suppose there are two types of products in your inventory, for e.g., Fragile and Non-Fragile. The fragile product must be handled carefully so that the shipping rates may be higher than the non-fragile products.
Therefore, shipping profiles are determined to put such product categories into order and evaluate the associated shipping rates in order.
General Shipping Profiles
If you have a small business and a simple shipping structure for a limited reach, a general shipping profile is a sufficient schema for the same.
A general shipping profile is provided by default through your Shopify account. So you don’t have to worry about it if the first argument is true.
However, businesses often prefer to create new shipping profiles due to their product location flexibility. If the product is not considered in a custom shipping bracket, it automatically falls under the general shipping profile category.
Now that we know what and how shipping profiles work on Shopify, you can build them only if you have a wide variety of products that need to be put under custom categories (As shown in the example above). Default shipping profiles are enough if you have enough needs.
Let’s understand how to set up shipping profiles on Shopify:
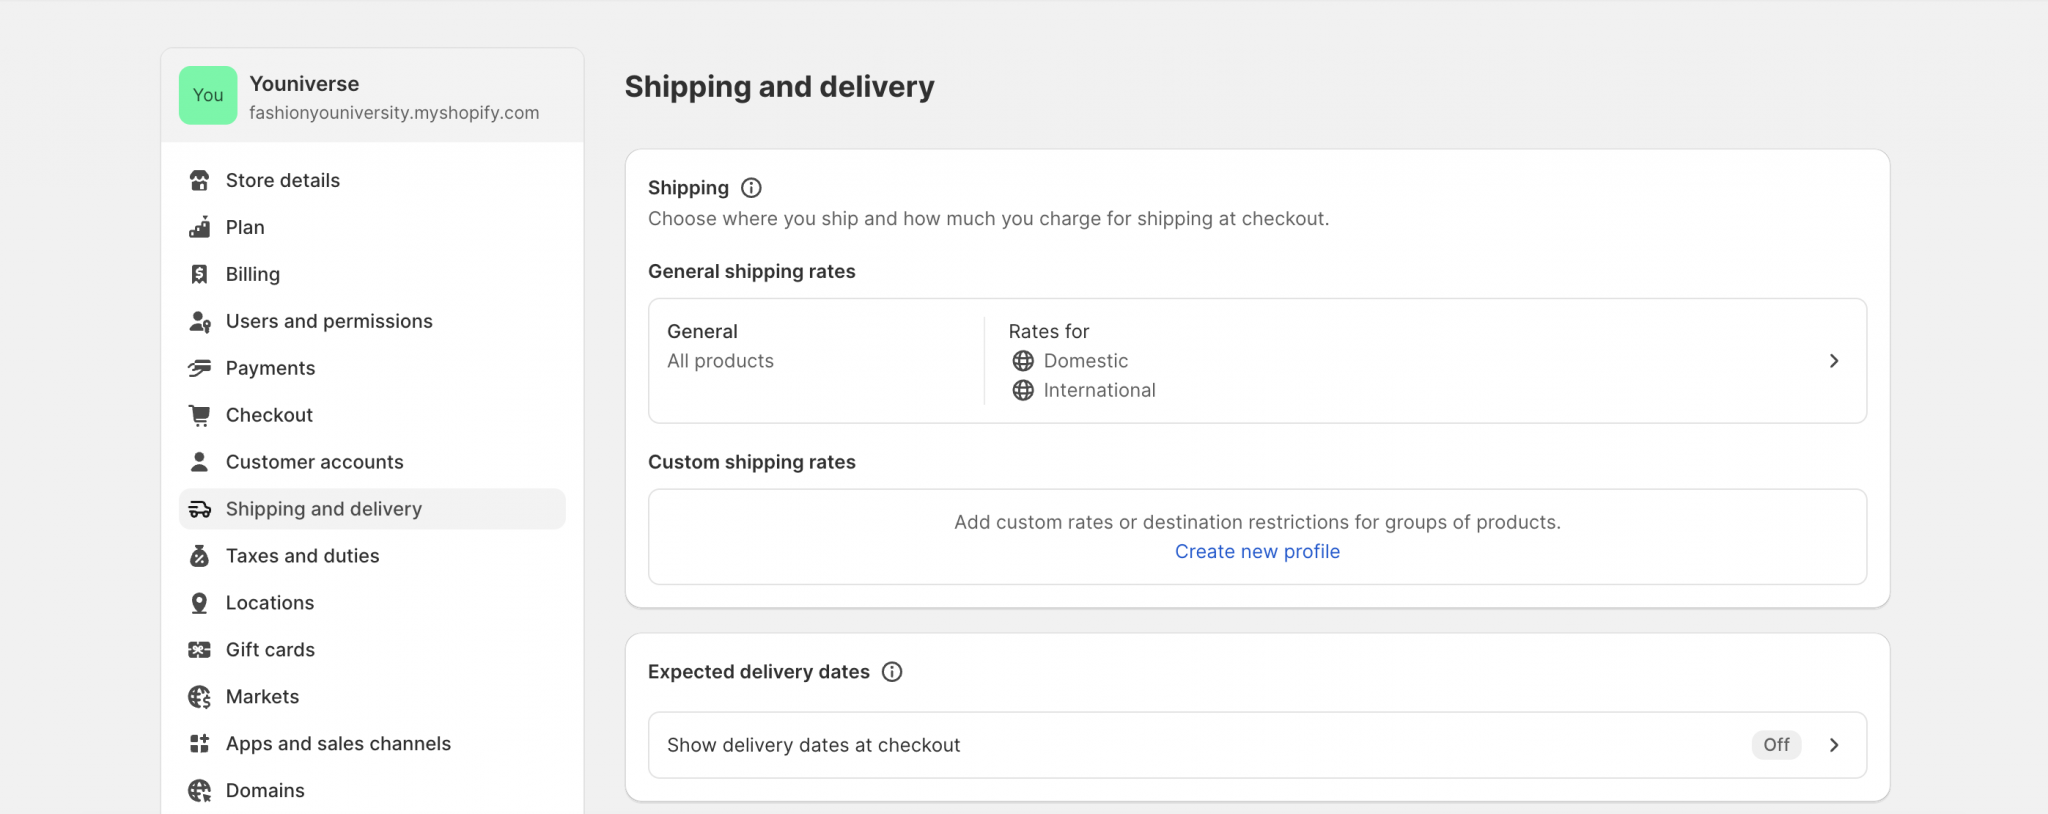
Head over to your Shopify store admin panel and select settings from the down-left corner of your screen.
Select Shipping & Delivery from the settings menu.
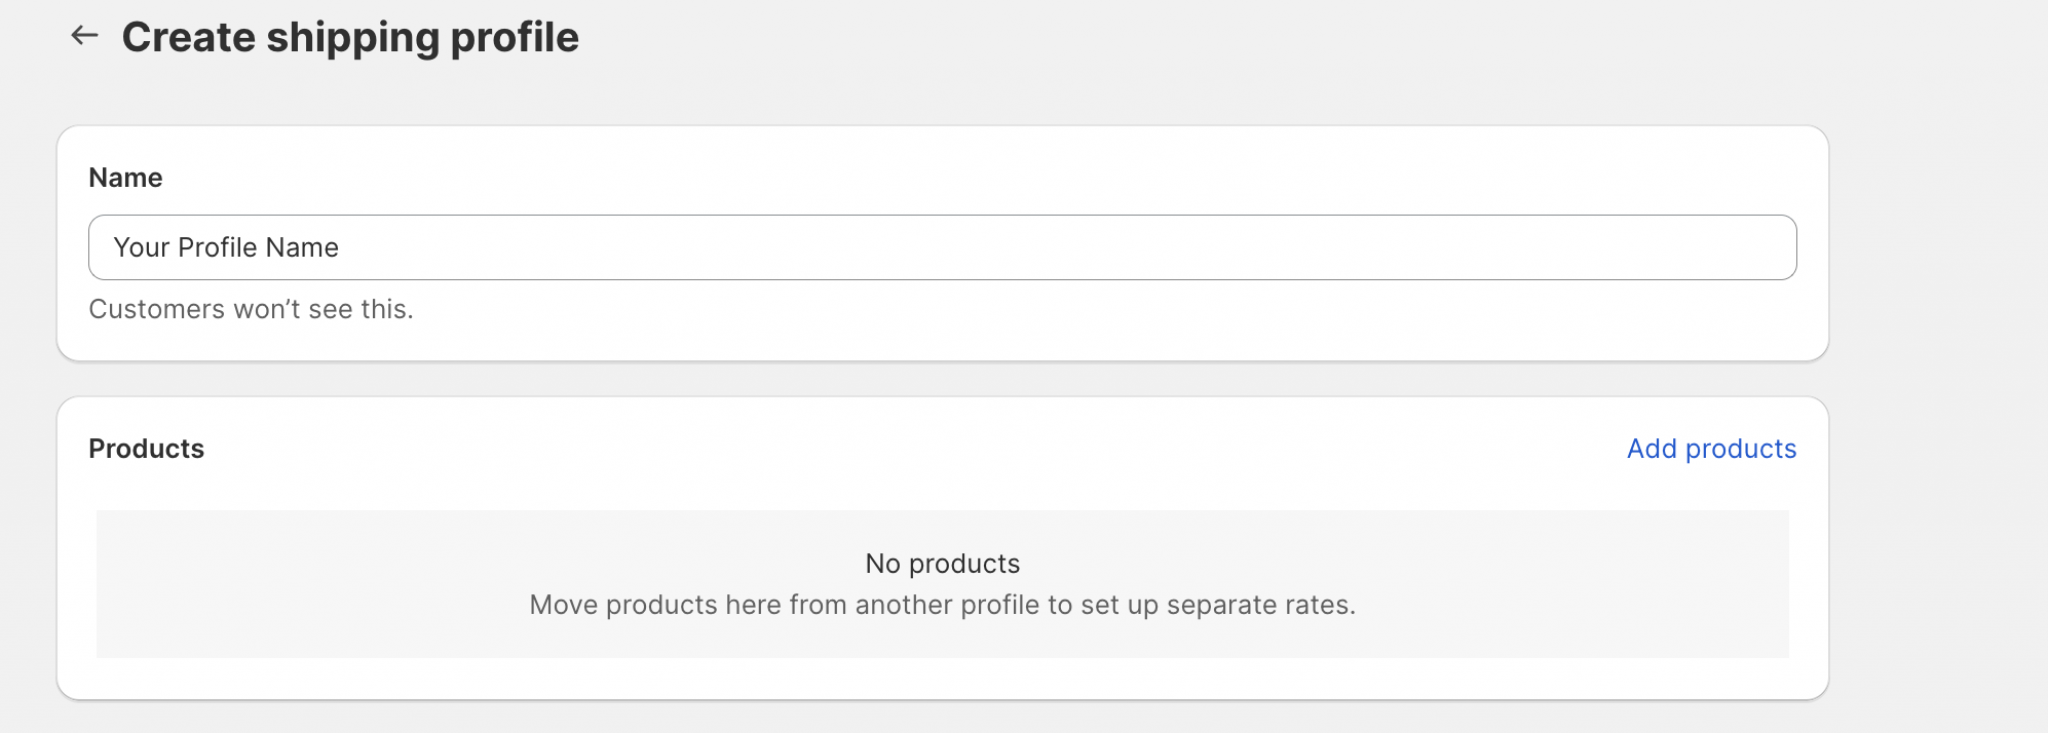
To create a custom shipping profile, select Create New Profile from the custom shipping rates section.
Enter your custom shipping profile name. (It’s only visible to the store owners who have administration access and not the customers)
Now you can add the particular products in the products section by clicking the Add Products button.
You can also move products from another custom profile if needed.
Step 3 – Shipping Zones
Shipping zones on Shopify are one of the most crucial parts you need to understand if you are selling online. Simply speaking, shipping zones are determined as areas or countries your products can reach. If you are able to ship products to different countries, shipping rates can be applied accordingly to the associated zone.
However, Shopify can set a default shipping zone according to your store’s location; for example, If your store is located in India, Shopify will automatically switch to India as a default shipping zone.
However, if you want to ship your products to a different country, you need to set up a custom shipping zone for the same.
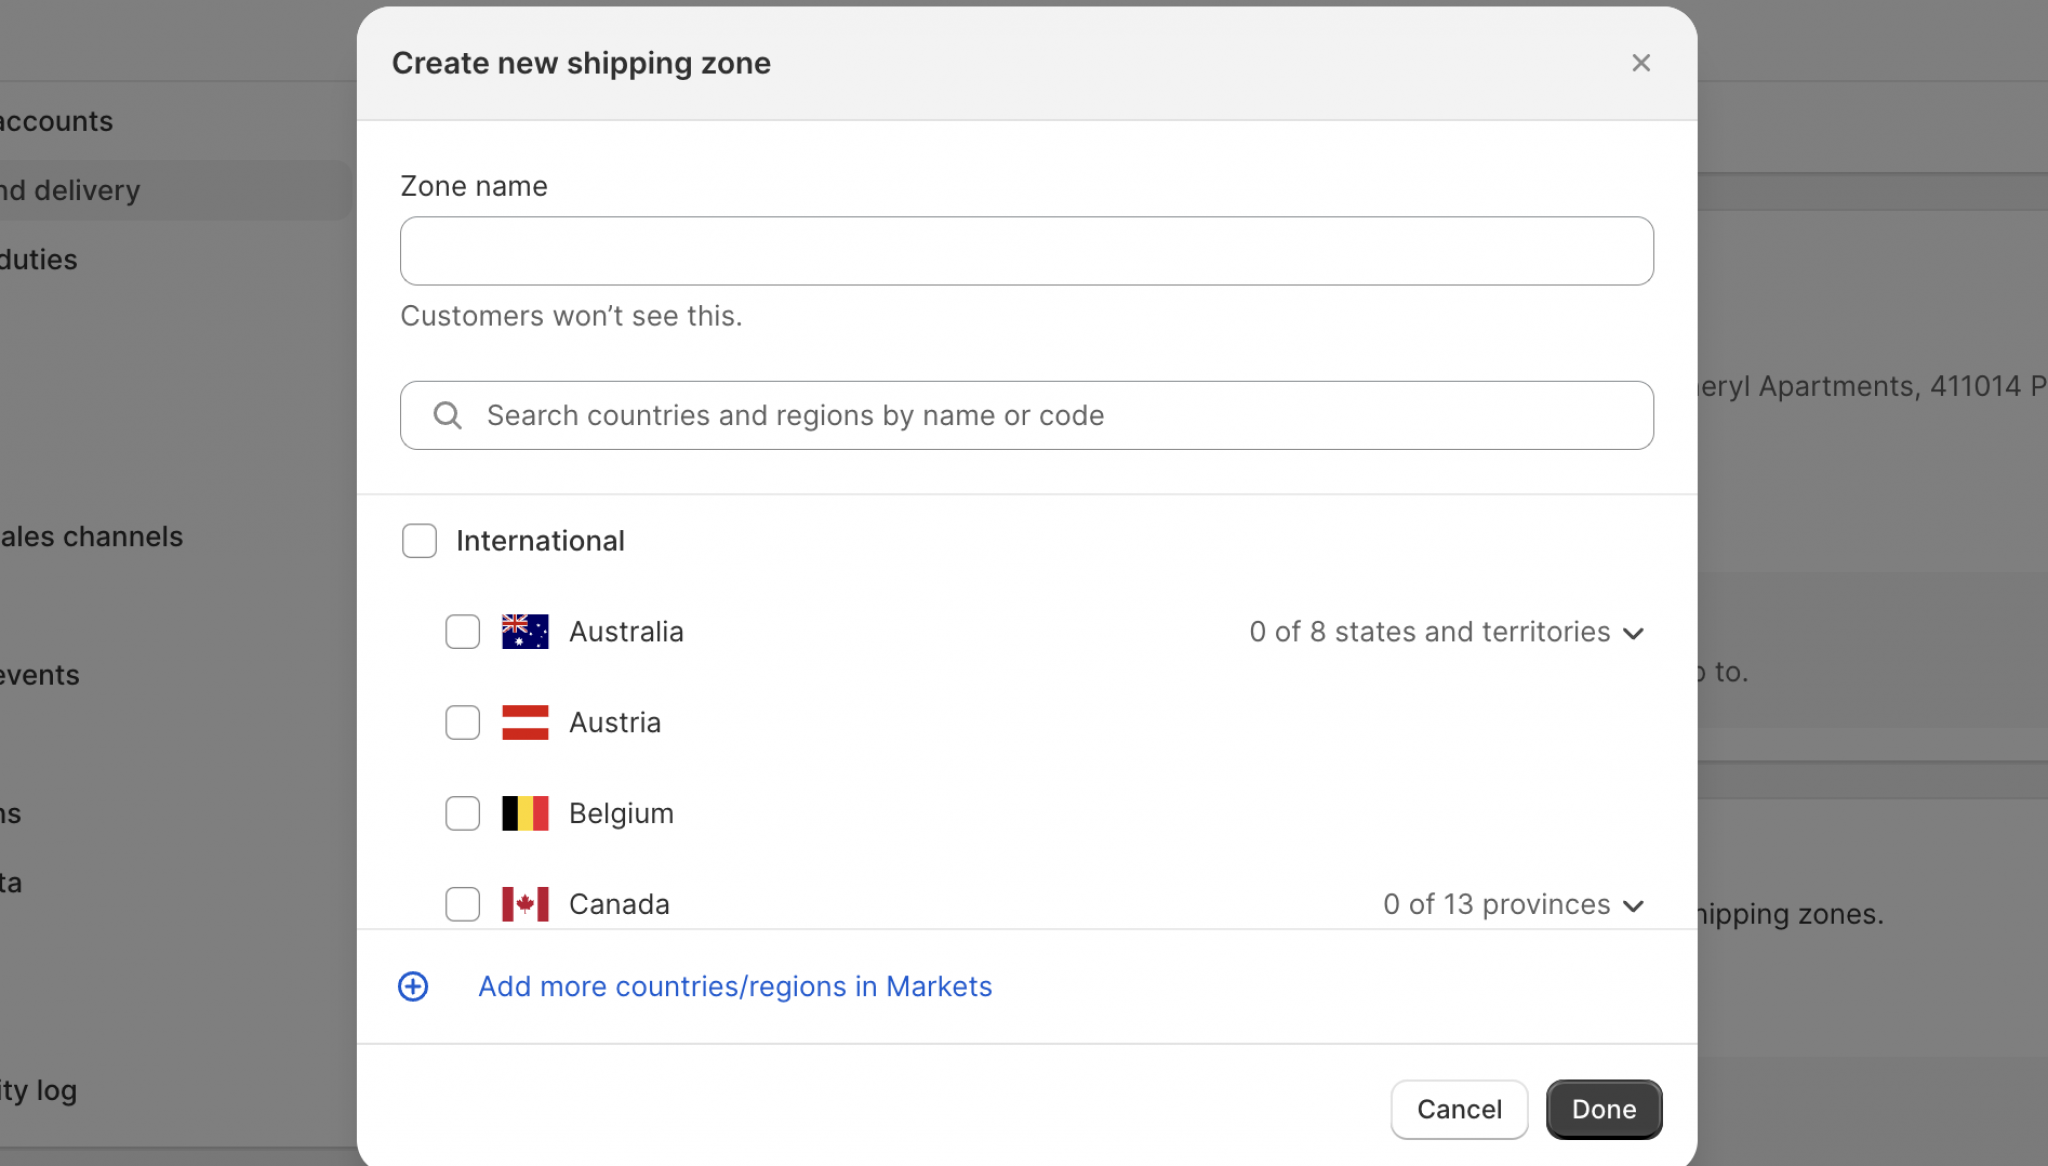
To do that, select Create Zone under the Shipping Zone section in the Shipping and Delivery. (If you’re not already on the same page, navigate yourself towards Settings > Shipping & Delivery > Create New Profile > Create Zone)

Now enter your zone name in the new zone section and add a country or a region that is in your zone.
Hit Done after ensuring all the information is True.
 \
\
Step 4 – Shipping Rates
After creating your custom shipping zone, you need to set up shipping rates for that specific zone.
Shipping rates are the extra charges associated with product shipping that are accountable to the buyers. Shipping rates can be displayed during the order checkout under the product’s total cost bill.
Every product comes under a custom shipping rate due to the various factors that are accountable:
✓ Product weight
✓ Product Price
✓ Product Quantity
✓ Product Type
Please note: Shipping rates may vary for different products in different countries.
Pro Tip: We recommend you include FREE shipping if you can afford it, as it’s proven to draw more attention, and buyers tend to go for it first rather than charged shipping costs.
You can also use the Shopify automatic shipping calculator. However, the shipping rates on this will be evaluated only on the basis of product weight. Therefore, if you have different-sized products in your inventory, you must create custom shipping rates.
As said above, we can divide the shipping rates into three categories:
General Shipping Rates
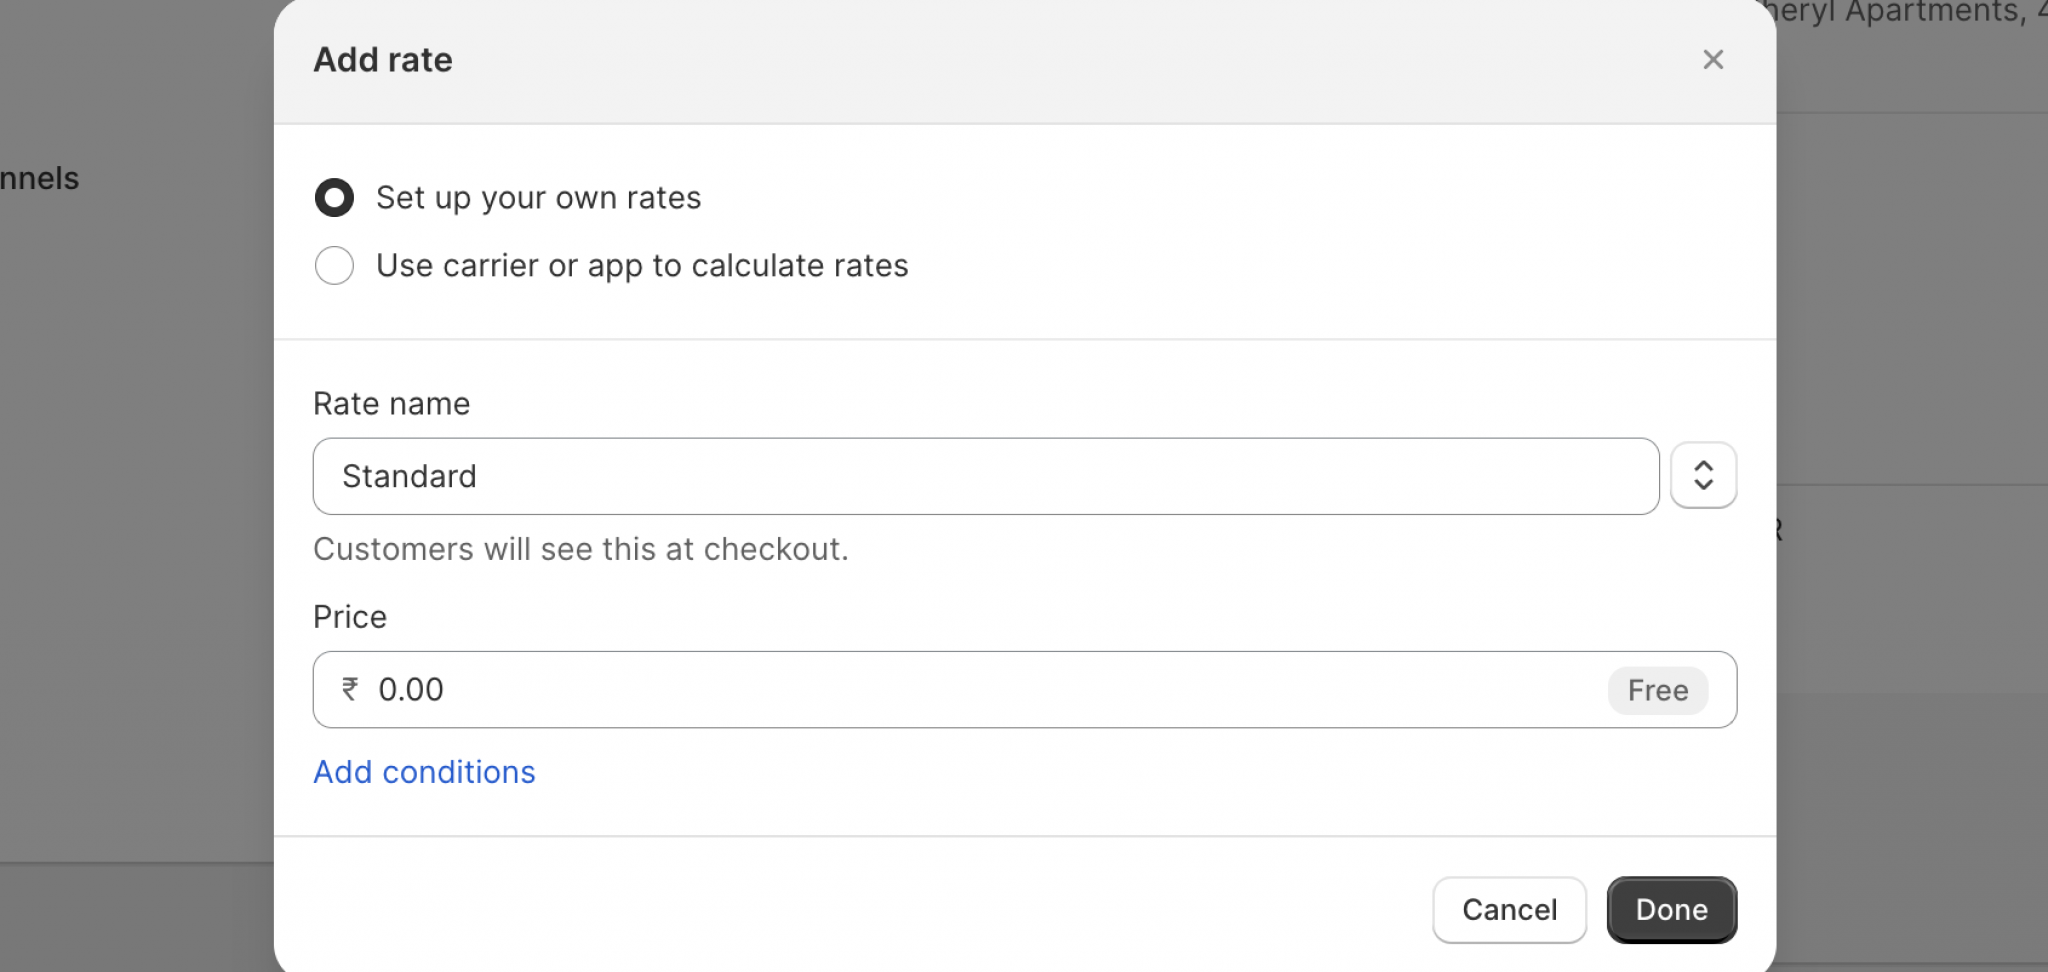
A general shipping rate, as discussed, can be put under the product bill on the checkout page. You can simply set up a constant rate that can be used each time a customer places an order.
This method helps sellers leverage the precise cause of how much they should charge at checkouts.

FREE Shipping Rates
If you want to attract customers into successfully buying your products in no time, then FREE shipping rates are the best boost you can give to speed up the purchase.
You can set the FREE shipping cost to $0 and directly convert it from a general shipping rate to a FREE shipping rate.
Calculated Shipping Rates
Shopify also provides calculated shipping rates that are evaluated, calculated and presented by carriers such as FedEx, Delhivery, USPS, UPS, etc.
You can share the product details added to the cart by the customer, and the shipping charges will be automatically calculated and presented to the seller.
We recommend this process if you want precise shipping rates per product.
Conclusion
We’re sure that our essential guide on how to set up shipping on Shopify has helped you through your shipping process and made your shipping journey a little less challenging.
If you are dealing with the same challenges, know that we marketers are with you on each step towards your successful growth in eCommerce.
To learn more about such guides and strategies on Shopify, stay connected with us. Schedule a call if you need any help, as our Shopify experts are here for you!




 \
\

