If you'd rather speak to someone now, call
+91 7219084311.
You can also email us at hello@valardigital.com
+91 7219084311.
You can also email us at hello@valardigital.com

Shopify is a powerful platform for an e-commerce business, but if you want to consider switching to another eCommerce platform, you have to know how to cancel your Shopify plan properly.
Canceling your Shopify subscription is pretty straightforward; you can either delete your Shopify account altogether or pause your subscription and start where you left off after some time.
In this article, we’ll learn how to properly back up your Shopify store before migrating your account and deleting it without interruption.
You can go ahead and directly delete your entire Shopify store, but you may want to choose a second option where you can pause your store subscription.
Pause and Build is a feature offered by Shopify where you can pause your store to make some important changes, such as adding a new product lineup and more.
Note: You’ll be set with a reduced $9 subscription charge in this paused phase.
Here’s how you can pause your Shopify store:
✓ Go ahead and log in to your store’s admin page.
✓ Select Settings from the bottom left of your screen.
✓ Select Plan.
✓ Click Pause or Deactivate Store.
✓ Select Pause and Build to pause your store subscription.
✓ You’ll have to agree to the new terms and conditions provided by Shopify and Select Switch to Pause and Build.
✓ Click Confirm Changes for a final step and done.
If you’ve decided to deactivate your Shopify store and delete everything, here’s a step-by-step guide to complete your process.
Note: We recommend you pause your Shopify store because you cannot retain it again after you cancel your subscription.
Before canceling your Shopify subscription, here are a few things you need to consider:
✓ Check if you owe any outstanding charges to your Shopify account.
✓ Shopify will send you a total invoice through an email so you can pay the final billing amount before proceeding.
✓ Ensure you’ve backed up and secured your store data in a file before canceling the plan (Recommended). You can purchase a new plan if you want to access your store data after the export.
Shopify product data can be exported in a CSV file format that includes all your important data, including each product title, tag, slug, SVG number, and more.
To do so, navigate your Shopify Admin page, select Products, and then select All Products by checking the box in the Select All Products section.
Click Export from the top of your screen after selecting All Products.

As soon as you hit Export, a pop-up will be revealed where you have to select your file format (you can export the file in a CSV format and Excel, Numbers, or a Spreadsheet)
Select your export preferences, such as all products or selected products, and hit Export Products when done.

Your CSV file will be downloaded on your device and sent to your connected email when you hit export products.
You don’t want to see any money deducted from your bank account besides the Shopify invoice. Some apps you’ve previously downloaded from Shopify App Store may still charge you even after closing your Store.
To avoid this situation, head over to your Shopify Admin dashboard and select Apps. For example, we’ve used a Google channel app below (Although it doesn’t charge anything but we prefer to keep it clean before shutting off the store)
Open your apps, and click the three-dots button from the top right corner of your screen, and hit Uninstall.

Your domain name can’t be automatically removed when you cancel your Shopify account. If you’ve bought a custom domain for your store, ensure you’ve moved that domain to another server. If not, there’s a high chance you’ll lose it.
You can access your Domain Name System (DNS) to find settings such as CNAME, MX, TXT, etc.
Note: You can transfer your domain name only after 60 days (2 months) of purchasing your Shopify account.
Transferring or Removing your Shopify domain highly depends on how you’ve purchased it. Your domain name can be removed easily if you’ve connected it through a third party. Just go to Settings > Domains and select Remove.

You can update your DNS settings after setting up your new hosting provider. If you own a Shopify domain, ensure your management is transferred to another hosting platform.
Head over to your Shopify account’s admin page and navigate to your Settings icon on the bottom left corner of your screen.
Select Plans in Settings and then go on and press Deactivate Store:

If you don’t want to deactivate your Shopify account completely, this is your chance to choose from three options.
1 – Switch to Pause and Build: This option can be handy when you want to pause your store to publish some important updates or import a new product lineup and re-launch your website.
2 – Start a new store: You can select this option if you want to start a new store completely from scratch (You can import all your products through a .CSV file to your new domain).
3 – Deactivate your Store: This is a way to go if you want to cancel your Shopify subscription completely. (Your store information can be retained within 2 years if you want to get back on your old account).
After selecting the appropriate option, you may need to inform Shopify about the reason for deactivating/pausing your account. After answering some subsequent questions, you can click Continue.
Note: To complete this process, you may need to re-enter your Shopify password.

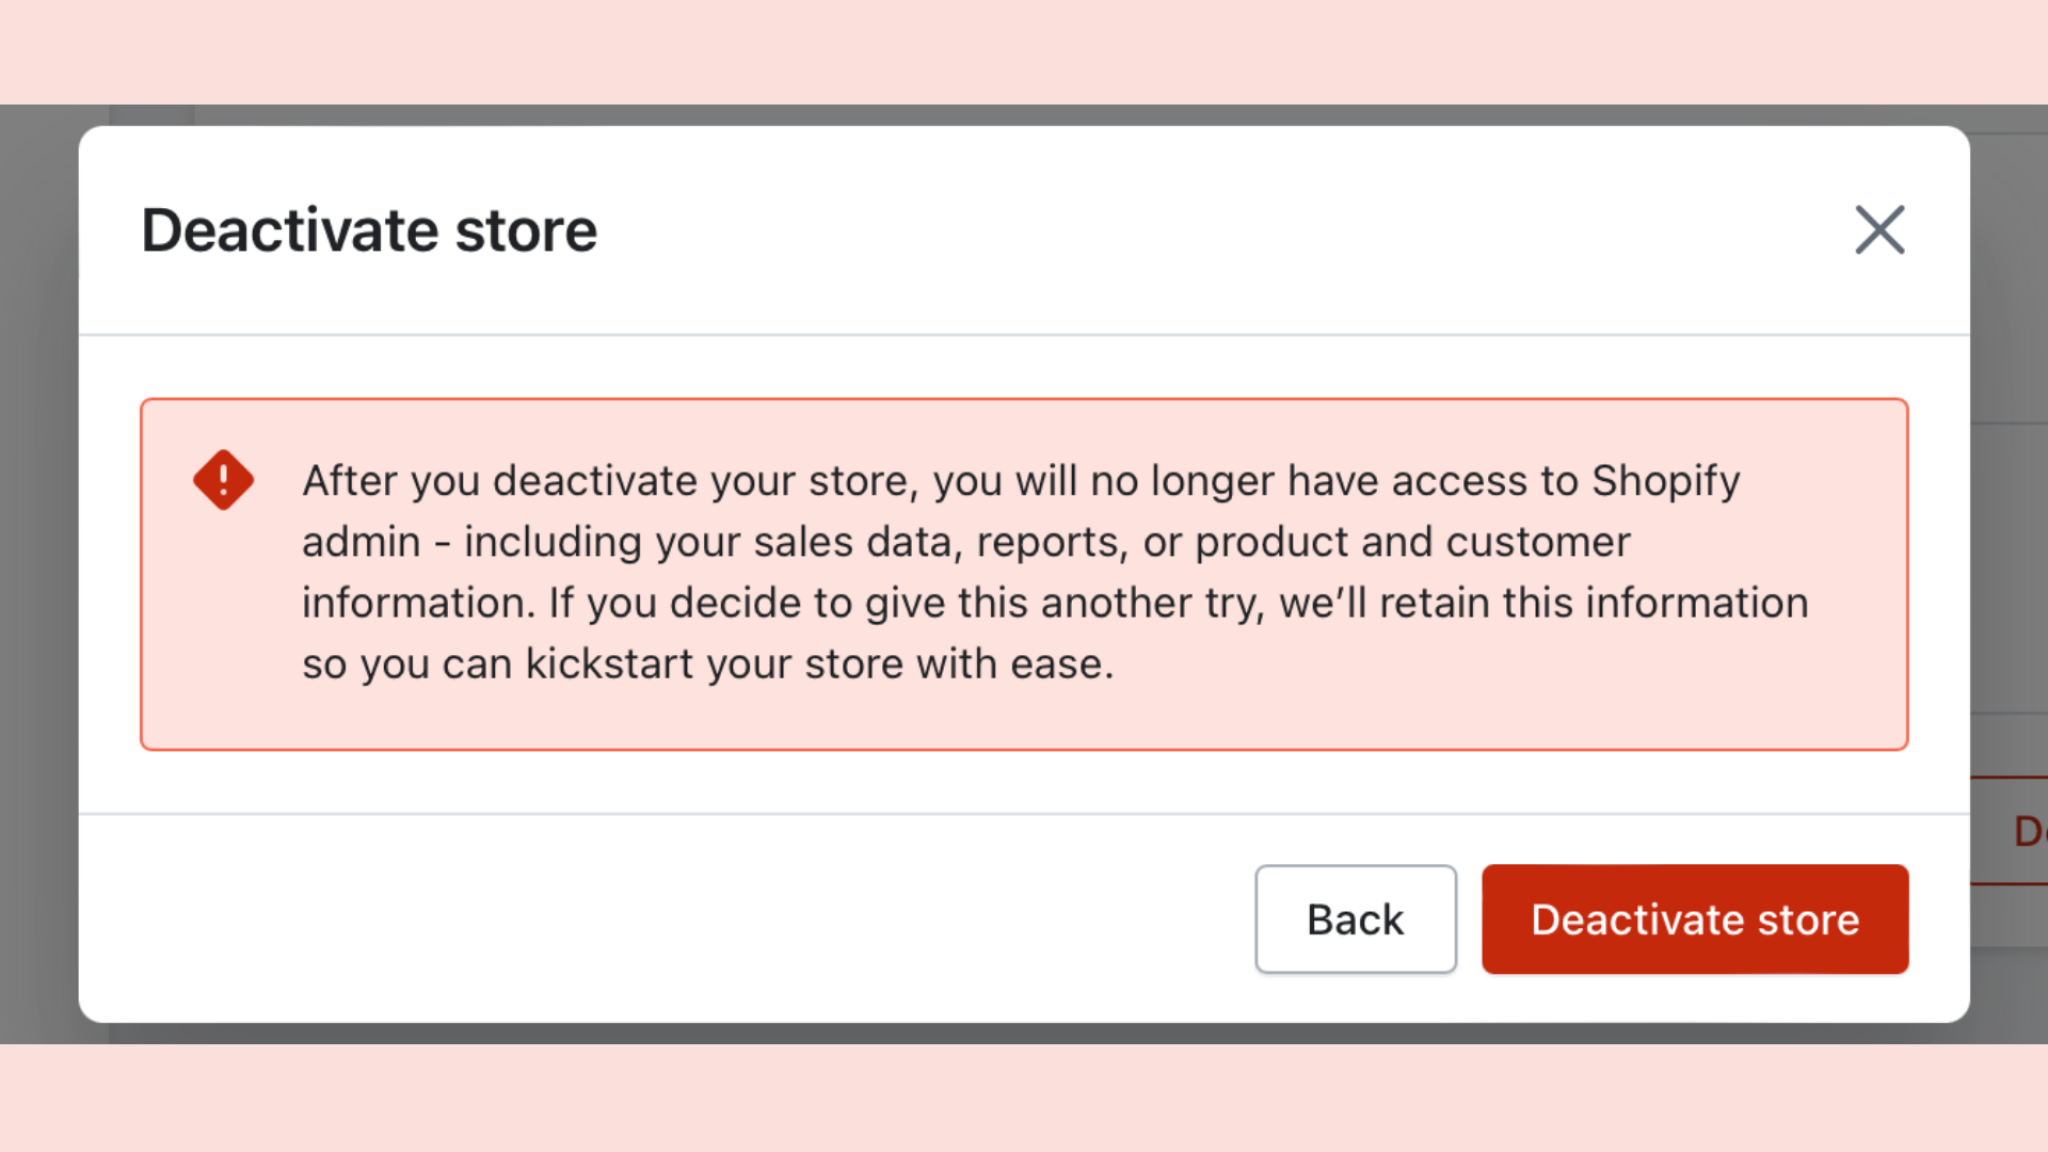
Once you re-enter your Shopify password, hit Deactivate Store. If done correctly, you’ll be redirected to your deactivation confirmation page.

f you see the below window, your Shopify store is successfully deactivated.

You can find your previous billing information by selecting View your Bills from the drop-down menu. You can also download all your bill receipts in a PDF file format.

You should now have a good idea about how to cancel your Shopify account. Although, let’s see some FAQs regarding Shopify cancelation so you won’t be left with any doubts:
You can use Shopify’s 14-day free trial without giving away any of your credit card information. Although Shopify does not promise any refunds after closing the store, you can cancel the FREE trial anytime you need.
After canceling your Shopify subscription, you will lose access to your Shopify admin section. You can retain your account access by filling in your credit card information and selecting the appropriate plan.
Don’t know which plan to select? Our 2023 guide to help you select the right Shopify plan for your business is ready to help!
Although you can’t access your previous domain for your new Shopify store.
We’ve tailored a simple guide to migrate Shopify to WooCommerce and vice versa, so you don’t need to worry about anything throughout the process.
To do so, you’ll need to purchase WordPress hosting and transfer your Shopify domain (Or create a new one on WordPress) to import all your products from your previous store.